How to send data to vMix?
There are several ways how to send data from Scoreboard OCR to vMix:
- Using vMx API. It is recommended to use this method, because it will provide the smallest delay and can be easily used between two computers.
- Using XML output
- Using CSV output. Not recommended, see below why.
- Using HTTP Feed output
- Using Browser Window
1. Using vMix API
Watch the video tutorial or read instructions below
- Make sure you have at least vMix version 22.0.0.68 installed (previous versions introduce latency when receiving data 10x a second and some users have reported render time spikes when using older versions)
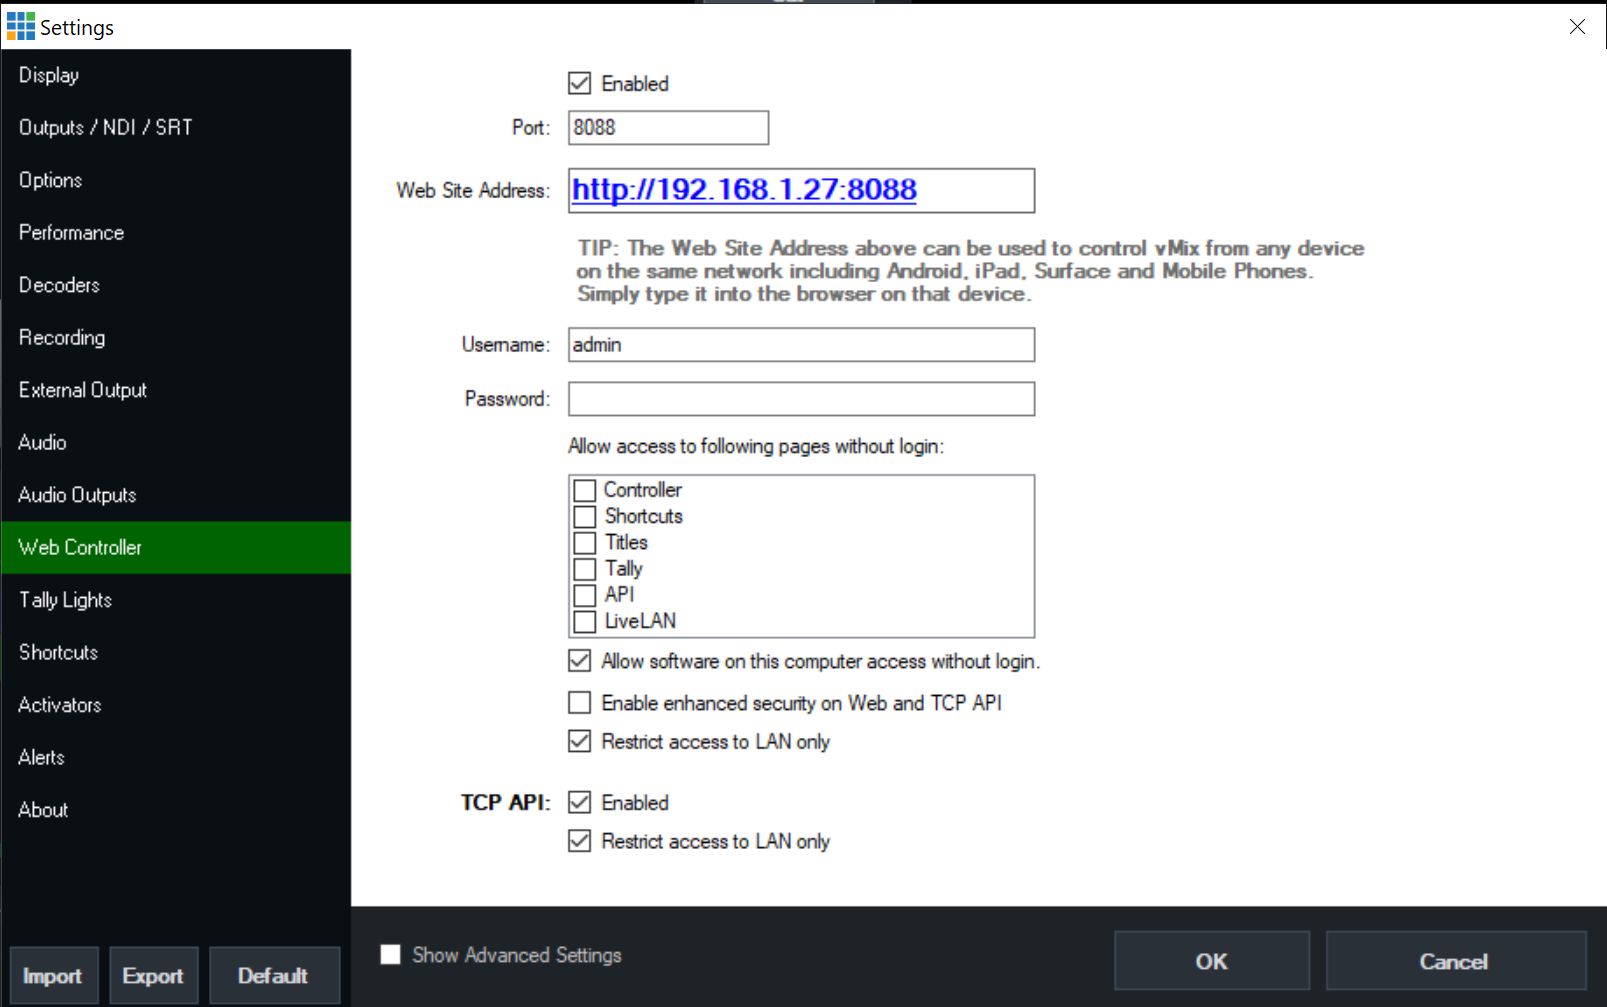
- Make sure that vMix API is enabled: Settings → Web controller → Enable | Restart vMIx after that
- Make sure that vMix → Settings → Web Controller → Enable enhanced security on Web and TCP API is DISABLED (unchecked)
- Choose “vMix API” in Scoreboard OCR and enter:
- host - the computer on which vMix is runing (use “localhost” if you are running Scoreboard OCR on the same computer as vMix). If you are running vMix on a different computer, use the IP address of that computer, for example “192.168.1.10”. Make sure the Windows Firewall on vMix computer is not blocking vMix API (if it is not working, you can always disable the firewall to makes sure it is not causing the problem)
- port - enter “8099” (this is the default vMix API port number and I dont think it can be changed, do not mix up with vMIx Web controller which uses port 8088)
- input_id - enter input id of the vMix XAML/GT template (if its the first input in vMix, then just enter 1)
- Use the same field names in Scoreboard OCR that are present in vMix XAML/GT template (for example if you have a field “Clock.Text” in vMix template, use the same name in Scoreboard OCR for match time). Field names are case sensitive!
- If you have more than one template in vMix, make sure you add multiple vMix outputs in Scoreboard OCR. Each output will correspond to the vMix input number of the template
- If you are using vMix GT templates, makes sure you add “.Text” and the end of the field name, for example “CLOCK.Text”
- Some of the templates use spaces in field names, for example “Away Score.Text”
- Field names are case sensitive
- If you need to send data to several gfx inputs in vMix, just add additional outputs in Scoreboard OCR

localhost:8099/1
192.168.1.10:8099/1
Here is what Scoreboard OCR will send to vMix:
FUNCTION SetText Input=1&SelectedName=Clock&Value=6:31
How to tell vMix to display a background image for fouls and penalty time using vMix API ?
- prepare a folder on your computer with the PNG images that you would like to display (such as fouls, serve direction, etc)
- in vMix Title Designer add an image field to your scorebug, for example, 'fouls_a'
- make sure you have Scoreboard OCR version at least 2020.10.09 installed
- add a Script type field such as 'fouls_a.Source' (make sure to add '.Source' part)
- add a Custom type field that will be used to recognize a digit on the scoreboard, such as 'fouls_a'
- draw the rectangle around the foul count
- use a sample script from one of the scripts below (make sure to adjust field names, image folder path) and copy it to the Script field 'fouls_a.Source':
If Scoreboard OCR sees that you are sending path to png, jpg, jpeg, gif or bmp file, it will also send the following command to vMix, which will cause image of the titles to update:
FUNCTION SetImage Input=1&SelectedName=Logo Image.Source&Value=C:\Samples\penalty_background.png
2. Using XML output
- Choose XML output in Scoreboard OCR
- Make sure you dont use field names with spaces, they are not allowed for XML output. For example, 'Score Home' will not work, you must use “ScoreHome”
- Choose XML data source in vMix and enter “/root” in xmlpath and then you will be able map any of Scoreboard OCR fields to any of vMix XAML/GT template fields. You will also be able to use multiple XAMLs/GTs at the same time.
- Make sure you change “Update data every” from 1sec to 100ms, if you want to correctly display 1/10 of a second match time and decrease latency
3. Using CSV output
- Choose CSV output in Scoreboard OCR
- Choose CSV data source in vMix
- Make sure you change “Update data every” from 1sec to 100ms, if you want to correctly display 1/10 of a second match time and decrease latency
- We have come across a problem when Scoreboard OCR outputs “47.3”, but vMix displays “47,3” (and “47.0” would get truncated to “47” in vMix). This is because vMix formats the numbers according to the system locale. This could be changed in Windows regional settings by changing the delimiter from comma to point, but could also cause problems for other applications.
4. Using HTTP Feed output
- Choose HTTP Feed output in Scoreboard OCR
- Copy/paste the HTTP Feed Output URL from Scoreboard OCR to vMix and enter “/root” in xmlpath and then you will be able map any of Scoreboard OCR fields to any of vMix XAML/GT template fields. You will also be able to use multiple XAMLs/GTs at the same time.
- Make sure you change “Update data every” from 1sec to 100ms, if you want to correctly display 1/10 of a second match time and decrease latency
5. Using Browser Window
If your graphics engine by default does not support reading data from sources at least 10x a second (which is crucial for some sports such as basketball), most probably you can use an alternative approach - add scoreboard data using a Browser Window.
Troubleshooting
vMix is not receiving any data from Scoreboard OCR using vMix API
Check if the field names in Scoreboard OCR are exactly the same as in vMix.
Here you can download vMix preset and Scorebaord OCR preset for working vMix GT Scoreboard sample
For example, vMix GT scoreboard field names are the following:
- Home Score.Text
- Away Score.Text
- CLOCK.Text
Take look at Title Editor for correct field names:

Usual mistakes:
- There is a space before “Score”
- You have to include the “.Text” part
- There is no space before the “.Text” part